
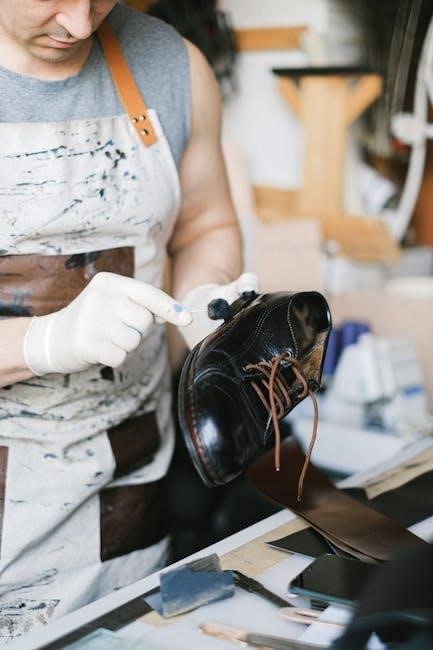
The Craftsman 18 Gauge Brad Nailer is a versatile tool designed for precision and ease of use, ideal for woodworking and trim projects. This manual provides essential guidance for both novice and experienced users, ensuring safe and effective operation of the tool. Proper usage and maintenance are key to maximizing its performance and longevity.
1.1 Overview of the Tool
The Craftsman 18 Gauge Brad Nailer is a high-performance tool designed for precision and versatility in woodworking and trim work. It features a compact, lightweight design with Precision Point technology for accurate nail placement. This tool is ideal for attaching thin materials without splitting, making it perfect for furniture assembly, crown molding, and other delicate projects. Its ergonomic design ensures comfort during extended use, while its robust construction guarantees durability and consistent performance across various tasks.
1.2 Importance of the Manual
The manual is crucial for understanding the Craftsman 18 Gauge Brad Nailer’s operation, safety guidelines, and maintenance requirements. It provides detailed instructions for assembling, using, and troubleshooting the tool, ensuring optimal performance and longevity. By following the manual, users can avoid common issues like improper nail loading or depth control problems, and maintain the tool’s efficiency over time. Regular maintenance, as outlined, prevents jams and ensures consistent results in various woodworking projects.

Key Features of the Craftsman 18 Gauge Brad Nailer
The tool features 18-gauge capability, Precision Point Technology for accurate nail placement, and an ergonomic design for comfort. It ensures reliable performance in various woodworking applications.
2.1 18-Gauge Brad Nailer Capability
The Craftsman 18 Gauge Brad Nailer is designed to handle 18-gauge brad nails, ideal for delicate trim work and thin materials. Its compact design allows for precise placement without splitting wood. Suitable for various woodworking projects, it ensures strong hold while maintaining a professional finish. The tool’s capability makes it versatile for both light and medium-duty tasks, catering to both DIY enthusiasts and professionals.
2.2 Precision Point Technology
The Precision Point Technology in the Craftsman 18 Gauge Brad Nailer enhances accuracy and control. Its smaller nose footprint allows for precise nail placement, reducing visibility in tight spaces. This feature minimizes marks on the workpiece, ensuring a clean finish. The technology also eliminates the need to compress the contact trip, making it easier to maneuver and operate. It’s ideal for detailed trim work and small projects, providing professional results with minimal effort.
2.3 Ergonomic Design for Comfort
The Craftsman 18 Gauge Brad Nailer features an ergonomic design that prioritizes user comfort. Its lightweight construction and balanced weight distribution reduce fatigue during extended use. The contoured grip is designed to fit naturally in the hand, providing a secure hold and precise control. This ergonomic approach ensures that users can work comfortably, even on lengthy projects, without experiencing discomfort or strain. Comfort and usability are central to its design, making it accessible for both professionals and DIYers.
Safety Precautions and Guidelines
Always wear eye and hearing protection. Keep loose clothing tied back and avoid jewelry that could get caught. Ensure the work area is clean and well-lit. Follow all manual instructions carefully to avoid accidents and ensure safe operation of the tool.
3.1 General Safety Tips
- Always wear safety glasses and hearing protection to prevent injury from debris or noise.
- Keep loose clothing and jewelry away from moving parts to avoid entanglement.
- Ensure the work area is clean, dry, and well-lit to minimize hazards.
- Avoid using the tool near flammable materials or in explosive environments.
- Never point the nailer at people or animals, even when unloaded.
- Keep children and bystanders away while operating the tool.
- Use the tool only for its intended purpose and follow all instructions carefully.
3.2 Eye and Hearing Protection
Always wear ANSI-approved safety glasses with impact-resistant lenses to protect against flying debris. Hearing protection, such as earplugs or earmuffs, is essential to prevent noise-induced hearing loss. Ensure proper fit for both eye and hearing protection to maintain comfort and effectiveness. Using both types of protection simultaneously is recommended for optimal safety while operating the nailer.
3.3 Proper Workpiece Preparation
Ensure the workpiece is clean, dry, and free from debris for optimal results. Secure the material firmly to prevent movement during operation. Always align the nailer perpendicular to the workpiece to avoid angled nails. Use clamps or vises to hold materials steady, especially for delicate or thin surfaces. Proper preparation minimizes errors and enhances the quality of your work, ensuring nails are driven accurately and consistently.
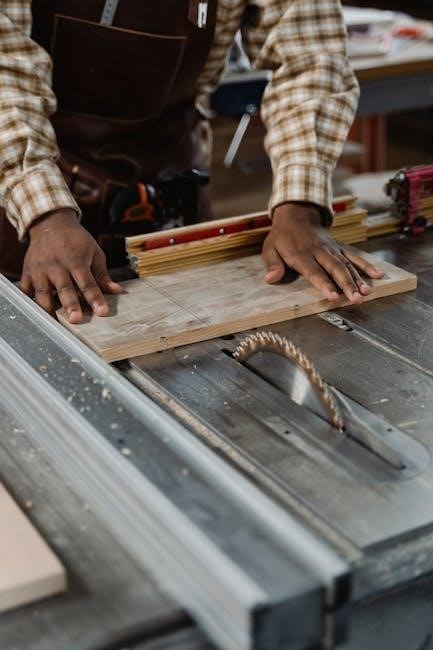
Assembly and Parts Identification
Begin by carefully unboxing and inspecting the tool for any damage. Identify key components like the magazine, trigger, and nail guide. Familiarize yourself with the parts diagram in the manual to ensure proper assembly and functionality. Proper identification and setup are crucial for safe and effective operation of the brad nailer.
4.1 Unboxing and Initial Inspection
Begin by carefully opening the package and inspecting the tool for any visible damage. Verify that all components, including the brad nailer, magazine, and accessories, are included. Check for any signs of wear or damage that could affect performance or safety. Refer to the manual’s parts diagram to ensure all items are accounted for. This step ensures a smooth setup process and proper functionality of the tool. Always prioritize safety during initial inspection.
4.2 Identifying Key Components
Familiarize yourself with the tool’s essential parts, such as the magazine, trigger, and nail gauge. Locate the safety mechanism, depth adjustment knob, and exhaust port. Ensure all components are in good condition; Refer to the manual’s diagram for accurate identification. Understanding each part’s function is crucial for safe and effective operation. This step helps in troubleshooting and maintaining the tool efficiently, ensuring optimal performance in various woodworking tasks. Always cross-check with the manual for clarity.
4.3 Initial Setup and Adjustments
Begin by adjusting the depth control to ensure nails set properly in your material. Set the nail gauge to match your nail size for consistent firing. Align the magazine correctly to avoid misfeeds. Perform a test fire into scrap wood to verify proper function. Consult the manual’s diagram for precise adjustment locations. Ensure all settings are secure before use. Proper setup ensures accuracy and prevents damage to your workpiece or the tool itself.
Loading the Brad Nailer
Open the magazine, insert compatible 18-gauge brads, aligning them properly. Ensure nails are seated correctly and the magazine is closed securely to prevent jams and ensure smooth operation.
5.1 How to Load Nails Correctly
Open the magazine by sliding the release latch. Insert 18-gauge brads, ensuring they align with the guide. Gently push the nails into the magazine until they click. Check compatibility with the tool’s specifications. Do not overfill the magazine. Close it securely to prevent jams. Always wear safety goggles during loading. Ensure the tool is turned off or unplugged before loading nails. Proper loading ensures smooth operation and prevents malfunctions.
5.2 Checking Nail Compatibility
Ensure the nails match the 18-gauge requirement. Verify nail length aligns with the project needs. Check the nail head type and finish for compatibility. Refer to the manual for specific recommendations. Using incorrect nails can cause jams or poor performance. Always confirm compatibility before loading to ensure optimal functionality.

Operating the Brad Nailer
Operate with proper technique for safety and efficiency. Use Precision Point Technology for accurate nail placement. Adjust depth settings for various materials. Always follow manual guidelines for optimal performance.
6.1 Proper Firing Techniques
Use proper firing techniques to ensure safety and efficiency. Hold the nailer at a 90-degree angle to the workpiece. Press the contact trip firmly without compressing it fully.
Align the nose with the target area. Squeeze the trigger smoothly to fire a nail. Avoid angling the tool, as this can cause misalignment or damage to the material.
6.2 Adjusting Nail Depth
To adjust nail depth, use the depth adjustment knob located on the tool. Turn the knob clockwise to increase depth and counterclockwise to decrease it. Ensure the nail sets properly without over-sinking. Test on scrap material first to achieve the desired depth. The Precision Point Technology helps maintain consistent nail placement, enhancing accuracy and finish quality. Refer to the manual for specific adjustments based on material thickness and type.
6.3 Best Practices for Different Materials
Adapt your technique based on the material. For softwoods like pine, use shorter nails to avoid splitting. With hardwoods, opt for longer nails for secure holds. When working with thin trim, adjust the nail depth to prevent material splitting. Test nail placement on scrap material first. The Precision Point Technology ensures accurate nail placement, reducing errors. Always match nail length to material thickness for optimal results and a professional finish.
Maintenance and Care
Regular maintenance ensures optimal performance. Clean the tool with a soft cloth, lubricate moving parts, and store in a dry place away from dust and moisture.
7.1 Cleaning the Tool
Regular cleaning is essential for maintaining your Craftsman 18 Gauge Brad Nailer’s performance. Turn off and unplug the tool before cleaning. Use a soft, dry cloth to wipe down the exterior, removing dirt and debris. For stubborn residue, lightly dampen the cloth with water, but avoid harsh chemicals or abrasive materials. Pay attention to the nail exit area, magazine, and other moving parts to ensure proper function. Never submerge the tool in water or use excessive moisture, as this can damage internal components. Cleaning after each use prevents dust buildup and ensures accuracy in nail placement. Always let the tool dry thoroughly before storing it. Regular maintenance extends the tool’s lifespan and ensures reliable operation.
7.2 Lubrication Requirements
Proper lubrication is crucial for the smooth operation of the Craftsman 18 Gauge Brad Nailer. Use a high-quality tool oil specifically designed for pneumatic tools. Apply a few drops to the air inlet and moving parts, such as the piston and cylinder, after cleaning. Excess oil can attract dust, so use it sparingly. Regular lubrication prevents rust and wear, ensuring the tool functions efficiently. Refer to the manual for specific lubrication points to maintain optimal performance and extend the tool’s lifespan.
7.3 Storage Tips
Proper storage is essential to maintain the performance and longevity of the Craftsman 18 Gauge Brad Nailer. Store the tool in a dry, cool place, away from direct sunlight and moisture. Use a protective case or bag to prevent dust and debris from accumulating. Ensure the tool is clean and free of nails before storage. Keep it out of reach of children and check for any damage or wear before storing. Regular inspections ensure the tool remains in good working condition for future use.
Troubleshooting Common Issues
Identify and resolve issues like misfires, jams, and depth control problems with step-by-step solutions. Regular maintenance and proper nail loading can prevent many common issues from arising.
8.1 Nailer Not Firing
If the nailer fails to fire, check for jams or empty nail magazines. Ensure the safety switch is not engaged and verify proper nail alignment. Inspect the air filter for cleanliness and confirm sufficient air pressure. Consult the manual for specific troubleshooting steps to resolve the issue promptly and safely, ensuring optimal tool performance and reliability in various woodworking applications.
8.2 Jamming Issues
Jamming can occur due to improper nail alignment or debris buildup. To resolve, turn off the tool and carefully remove any obstructed nails. Ensure the magazine is loaded correctly and nails are compatible. Check for dust or dirt in the nail path and clean as needed. Regular maintenance, such as lubricating moving parts, can help prevent jams. Always refer to the manual for specific disassembly and cleaning instructions to maintain optimal performance.
8.3 Depth Control Problems
If the nailer isn’t driving nails to the correct depth, check the depth adjustment knob. Ensure it’s set properly for the material thickness. Clean the tool to remove any debris that might interfere with depth control. If issues persist, inspect the driver blade for wear or damage. Replace worn parts as needed. Proper lubrication and regular maintenance can also help maintain consistent depth control. Refer to the manual for detailed adjustment instructions.

Warranty and Repair Information
The Craftsman 18 Gauge Brad Nailer is backed by a limited warranty covering defects in materials and workmanship. For repairs, contact Craftsman customer support or visit an authorized service center. Proper documentation and proof of purchase are required. Warranty details and repair options are outlined in the manual to ensure hassle-free service and maintenance support.
9.1 Understanding the Warranty
The Craftsman 18 Gauge Brad Nailer is covered by a limited warranty program, ensuring protection against defects in materials and workmanship. The warranty duration varies by product and region, typically covering repairs or replacements for a specified period. To access warranty service, users must contact Craftsman customer support or visit an authorized repair center. Proof of purchase and proper documentation are required. This warranty program reflects Craftsman’s commitment to quality and customer satisfaction.
9.2 Repair Process and Support
The repair process for the Craftsman 18 Gauge Brad Nailer involves contacting authorized service centers or Sears directly. Users can initiate repairs by visiting the Craftsman website or calling customer support. Ensure to have the tool’s serial number and proof of purchase ready. Repairs typically cover defects under warranty, restoring the nailer to optimal performance. Craftsman’s support team provides guidance throughout the process, ensuring a smooth and efficient resolution to any issues that may arise during usage.
Additional Resources
Access the full manual online, contact Craftsman customer support for assistance, and explore online forums for tips and troubleshooting advice from experienced users and professionals.
10.1 Accessing the Full Manual
To access the full manual for the Craftsman 18 Gauge Brad Nailer, visit the official Craftsman website or Sears PartsDirect. Search for your model number to download the PDF manual. This resource provides detailed instructions, troubleshooting guides, and maintenance tips; Ensure you have the correct model number for accurate information. The manual is essential for understanding safety precautions, operation, and care for your brad nailer. Print or save it for easy reference during projects.
10.2 Customer Support Contact
For assistance with your Craftsman 18 Gauge Brad Nailer, contact Craftsman customer support at Craftsman.com or call their toll-free number: 1-888-331-4569. Representatives are available Monday-Friday, 8AM-5PM EST. You can also reach out via email through their website or visit a local Sears store for in-person support. Ensure to have your model number ready for quicker service. Their team is ready to address any questions or concerns about your brad nailer.
10.3 Online Forums and Communities
Engage with online forums like Reddit’s r/woodworking or DIY enthusiast groups to connect with users of the Craftsman 18 Gauge Brad Nailer. These communities offer valuable insights, troubleshooting tips, and project ideas. Visit Reddit or DIY forums to share experiences and gain knowledge. Active participation can enhance your tool usage and solve common issues efficiently. Join today to network with fellow craftsmen and enthusiasts.