
Welcome to the Canon AE-1 camera manual, your guide to mastering this iconic 35mm SLR. Introduced in 1976, the AE-1 revolutionized photography with its microprocessor-controlled exposure system, offering advanced features like programmed AE, shutter-speed priority, and manual override. This manual provides detailed instructions on camera operations, lens compatibility, and troubleshooting, ensuring you unlock the full potential of your AE-1.
1.1 Overview of the Canon AE-1 Camera
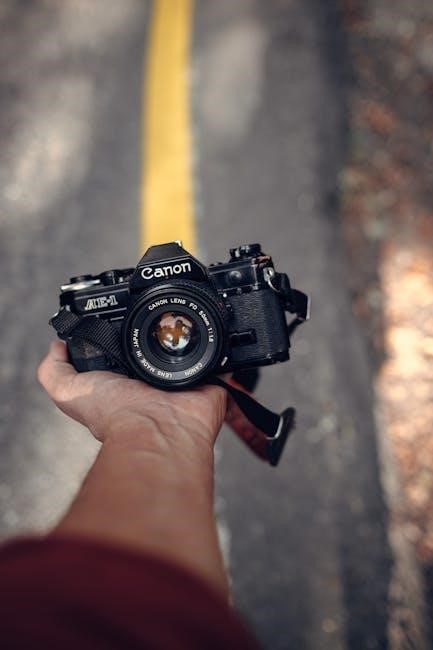
The Canon AE-1, introduced in 1976, is a groundbreaking 35mm SLR camera that combines simplicity with advanced features. Known for its durable build and intuitive design, it features a microprocessor-controlled exposure system, offering modes like programmed AE, shutter-speed priority, and manual override. Compatible with Canon FD lenses, the AE-1 includes a built-in flash shoe and ergonomic controls. Its compact design, coupled with a user-friendly interface, makes it a favorite among professionals and hobbyists alike. The camera’s versatility and reliability have cemented its legacy in photography history.
1.2 Importance of the Manual for Proper Usage
The Canon AE-1 manual is essential for maximizing camera performance and understanding its features. It provides step-by-step guidance for loading film, setting film speed, and using exposure modes like programmed AE and shutter-speed priority. The manual also covers troubleshooting common issues, such as camera shake warnings and error indicators. Proper use of the manual ensures optimal functionality, prevents errors, and helps users explore advanced techniques like flash photography and manual overrides. By following the manual, photographers can unlock the AE-1’s full potential and achieve professional-quality results consistently.
Key Features of the Canon AE-1
The Canon AE-1 is an iconic camera with a microprocessor-controlled exposure system, offering Programmed AE, Shutter-Speed Priority, and Manual modes. It uses Canon FD lenses, ensuring compatibility and high image quality.
2.1 Build Quality and Design
The Canon AE-1 features a robust brass body wrapped in black chrome, ensuring durability. Its ergonomic design includes intuitive controls, such as the mode dial and aperture ring. The camera’s battery compartment, located at the front, uses a 6-volt silver-oxide battery, easily replaceable with a screwdriver. The build quality and design emphasize reliability, making the AE-1 a favorite among photographers for its balance of functionality and ease of use.
2.2 Viewfinder and Metering System
The Canon AE-1 features a bright, fixed prism viewfinder with a split-image microprism for precise focusing. The viewfinder displays aperture, shutter speed, and exposure warnings. A built-in metering system uses a center-weighted, through-the-lens (TTL) design for accurate exposure calculations. The camera includes warning indicators, such as a blinking ‘P’ for camera shake and a red ‘M’ LED for manual aperture overrides, ensuring optimal shooting conditions. These features make the AE-1’s viewfinder and metering system highly functional and user-friendly for photographers of all skill levels.
2.3 Shutter Speed and Aperture Control
The Canon AE-1 offers precise control over shutter speed and aperture. Shutter speeds range from 1/1000th of a second to 30 seconds, plus a bulb (B) setting for long exposures. The aperture is controlled via the lens aperture ring, with an ‘A’ setting for automatic operation in AE modes. A manual override allows for precise adjustments, while an interlocking mechanism prevents incompatible settings. The camera’s electronically controlled shutter ensures accurate exposures, and the aperture ring’s ‘A’ mark enables seamless switching between manual and automatic modes for enhanced versatility in various shooting scenarios.
2.4 Exposure Modes: Programmed AE, Shutter-Speed Priority AE, and Manual Override
The Canon AE-1 offers three exposure modes for flexible shooting. Programmed AE automatically sets both shutter speed and aperture for effortless photography. Shutter-Speed Priority AE allows you to set the shutter speed, while the camera adjusts the aperture. Manual Override enables full control over both settings for precise exposures. These modes cater to different skill levels, from beginners preferring automation to professionals seeking creative control. The camera’s microprocessor ensures accurate exposures, while the manual override provides the freedom to experiment with custom settings, making the AE-1 versatile for various photographic situations and preferences.

Operating the Canon AE-1
Operating the Canon AE-1 involves setting film speed, installing the 6-volt battery, and mastering basic shooting techniques for optimal performance and image quality effortlessly.
3.1 Loading Film
Load film in a dark environment or using a changing bag to prevent exposure. Open the camera back, attach the film leader to the take-up spool, and advance the film using the rapid advance lever until it reaches the first frame. Ensure the film is securely seated and the leader is aligned properly. Close the camera back and advance the film to the first exposure. Always check the film counter to confirm it’s loaded correctly for accurate shooting.
3.2 Setting Film Speed
To set the film speed on your Canon AE-1, first push the film advance lever to its stand-off position. This allows access to the film speed dial located beneath. Lift the shutter speed dial and rotate it to match your film’s ISO rating. Ensure the dial clicks securely into place to maintain the correct setting. Accurate film speed is crucial for proper exposure, so double-check the ISO on your film canister before setting. This step ensures your camera is calibrated for optimal results with your chosen film stock.
3.3 Using the Battery Compartment
The battery compartment on the Canon AE-1 is located at the front of the camera. To access it, use a small screwdriver to push the compartment latch. Insert a 6-volt silver-oxide battery, ensuring proper alignment. The manual recommends using the insulator cover from the film box to help open the compartment. Once the battery is installed, close the latch securely. Proper battery installation is essential for the camera’s electronic functions, including metering and shutter operation. Always refer to the manual for specific instructions to ensure correct usage and maintenance.
3.4 Basic Shooting Techniques
Mastering basic shooting techniques with the Canon AE-1 ensures optimal results. Always hold the camera firmly, with your right hand supporting the grip and your left hand cradling the lens. For sharp focus, align your subject within the viewfinder’s center circle and gently press the shutter button halfway. Advance the film after each shot using the film advance lever. When shooting handheld, use a shutter speed of at least 1/125s with a 100mm lens or 1/250s with a 200mm lens to minimize camera shake. Proper technique enhances image quality and camera longevity.

Exposure Modes in Detail
The Canon AE-1 offers three exposure modes: Programmed AE, Shutter-Speed Priority AE, and Manual Override, providing flexibility for various shooting conditions and creative control.
4.1 Programmed AE Mode
In Programmed AE mode, the Canon AE-1 automatically selects both aperture and shutter speed for optimal exposure, making it ideal for beginners or quick shooting situations. Simply set the lens aperture to “A,” and the camera will handle the rest, ensuring balanced exposure. This mode is user-friendly and efficient, allowing you to focus on composition while the camera manages technical settings. It’s perfect for capturing sharp images in varying lighting conditions without manual adjustments.
4.2 Shutter-Speed Priority AE Mode
In Shutter-Speed Priority AE mode, you manually set the shutter speed, and the camera automatically adjusts the aperture for proper exposure. This mode is ideal for controlling motion effects, such as freezing fast-moving subjects or creating blur for artistic effects. Simply select your desired shutter speed using the dial, and the AE-1 will calculate the corresponding aperture. A blinking “P” in the viewfinder warns of potential camera shake, suggesting the use of a tripod or flash. This mode offers flexibility for creative control while maintaining automatic exposure accuracy.
4.3 Manual Override for Custom Settings
The Manual Override feature allows photographers to take full control of both shutter speed and aperture settings, bypassing the camera’s automatic exposure modes. This mode is ideal for those who prefer precise control over their shots, especially in challenging lighting conditions. By adjusting the aperture ring and shutter speed dial manually, you can achieve customized exposures tailored to your creative vision. The Manual Override ensures flexibility and artistic freedom, making it a powerful tool for advanced photographers seeking to experiment beyond automatic settings.
Lens Compatibility and Usage
The Canon AE-1 is designed to work seamlessly with Canon FD lenses, ensuring optimal performance in automatic exposure modes. Non-FD lenses can also be used, but manual operation is required for proper functionality. Explore the versatility of the AE-1 with its wide range of compatible lenses for diverse photography needs.
5.1 Canon FD Lenses
Canon FD lenses are specifically designed for the AE-1, ensuring seamless compatibility and optimal performance in automatic exposure modes. These lenses feature a unique mounting system that allows for precise communication between the lens and camera, enabling accurate metering and aperture control. The FD series includes a wide range of focal lengths, from wide-angle to telephoto, making it versatile for various photography applications. For proper functionality, always ensure the lens is properly mounted and the aperture ring is set to the “A” position. This ensures the camera can automatically adjust settings for perfect exposures.
5.2 Using Non-FD Lenses on the AE-1
While the AE-1 is optimized for Canon FD lenses, non-FD lenses can be used with certain limitations. When using non-FD lenses, the aperture must be set manually, as automatic exposure modes will not function properly. Ensure the aperture ring is not set to the “A” position, as this may cause exposure errors. For accurate metering, stop down the lens to the desired aperture before taking a reading. Note that some features, like programmed AE, may not work correctly with non-FD lenses. Always refer to the lens manufacturer’s instructions for compatibility details.

Advanced Shooting Techniques
Master advanced techniques like handheld shooting, flash usage, and creative exposure control. These methods enhance stability, optimize lighting, and unlock the AE-1’s full creative potential for stunning results.
6.1 Handheld Shooting Guidelines
For stable handheld shooting, use shutter speeds of 1/125 second or faster with a 100mm lens and 1/250 second or faster with a 200mm lens. Grip the camera firmly, with your right hand under the lens and your left hand supporting the body. Keep your elbows close to your body and take a deep breath before pressing the shutter. Avoid shaky hands by ensuring proper technique. If the camera warns of potential shake (blinking P), use a tripod or flash for sharper results.
6.2 Using Flash in AE Modes
In AE modes, the Canon AE-1 supports flash photography for enhanced lighting control. When using the flash, ensure it is compatible with the camera’s automatic exposure system; In Programmed AE, the flash operates automatically, adjusting aperture and shutter speed. In Shutter-Speed Priority AE, set the shutter speed, and the flash adjusts accordingly. For non-FD lenses, manual flash calculation may be required. Always secure the flash to the hot shoe and ensure proper synchronization to avoid overexposure or camera malfunction.
Troubleshooting Common Issues
Common issues include camera shake warnings, indicated by a blinking ‘P,’ and manual aperture warnings with a red LED. Use a tripod or flash for stability and ensure the aperture ring is set to ‘A’ for proper AE functionality.
7.1 Warning Lights and Error Indicators
The Canon AE-1 features warning lights to alert users of potential issues. A blinking ‘P’ indicates camera shake when shutter speeds are too slow, suggesting the use of a tripod or flash. Additionally, a red LED may flash to signal manual aperture control issues, ensuring the aperture ring is set to ‘A’ for proper AE functionality. These indicators help prevent common errors, guiding users to adjust settings for optimal results. Always refer to the manual for specific solutions to these warnings to maintain the camera’s performance and image quality.
7.2 Resolving Camera Shake Warnings
The Canon AE-1 alerts users to camera shake with a blinking ‘P’ in the viewfinder when shutter speeds are 1/30 sec or slower. To resolve this, use a tripod or external flash to stabilize the camera. For handheld shooting, ensure shutter speeds are appropriate for your lens focal length—1/125 sec for 100mm and 1/250 sec for 200mm. These adjustments help prevent blur and ensure sharp images, optimizing your photography experience with the AE-1.
Maintenance and Care
Regularly clean the camera and lens with a soft cloth to prevent dust buildup. Store the AE-1 in a dry, cool place to maintain optimal functionality and longevity.
8.1 Cleaning the Camera and Lens
Cleaning is essential to maintain your AE-1’s performance. Use a soft, dry cloth to wipe the camera body and lens, removing fingerprints and smudges. For stubborn spots, dampen the cloth slightly but avoid harsh chemicals. The viewfinder and mirror should be cleaned with a microfiber cloth to prevent scratches. Regular cleaning prevents dust from entering the camera, ensuring clear images. Always handle the lens with care to avoid scratches and maintain optical clarity. This routine will extend the life of your equipment and preserve image quality.
8.2 Storing the Camera Properly
Store your Canon AE-1 in a cool, dry place away from direct sunlight and humidity. Use silica gel packets to absorb moisture and prevent fungus growth. Keep the camera in its original case or a protective pouch to shield it from dust and scratches. Avoid extreme temperatures, as they can damage internal components. Always remove the battery when storing for extended periods to prevent corrosion. Regularly inspect the camera and lens for dust or damage. Proper storage ensures your AE-1 remains in optimal condition for years of reliable use;
The Canon AE-1 manual equips you to master its features, ensuring optimal performance. By following these guidelines, you’ll unlock its full potential for creative photography.
9.1 Summary of Key Features and Operations
The Canon AE-1 combines advanced features like programmed AE, shutter-speed priority, and manual override with a user-friendly design. Its compatibility with Canon FD lenses ensures precise control, while the microprocessor enhances exposure accuracy. The camera operates with a 6-volt battery, supporting both automatic and manual modes. Film loading and speed setting are streamlined for ease of use. With its durable build and versatile functionality, the AE-1 is a timeless tool for photographers seeking creative control and reliability in various shooting conditions.
9.2 Final Tips for Getting the Most Out of Your Canon AE-1
To maximize your Canon AE-1 experience, ensure regular maintenance, such as cleaning the lens and viewfinder. Always use Canon FD lenses for optimal performance and explore manual override for creative control. Experiment with different shooting modes and practice handheld techniques for sharper images. Use a tripod for stability in low-light conditions and keep extra batteries handy. Familiarize yourself with the camera’s unique features, like the warning lights for camera shake. By mastering these tips, you’ll unlock the full creative potential of your AE-1 and capture exceptional photographs.